> ## Documentation Index
> Fetch the complete documentation index at: https://forest-chore-open-api.mintlify.site/llms.txt
> Use this file to discover all available pages before exploring further.
# Extend a route
> ⚠️ This page is relevant only if you installed Forest directly on a database (SQL/Mongodb). If you installed in a Rails app, check the "Override a route" page.
Extending a route is a clean way to achieve more by building on top of Forest's existing routes.
To extend a route, simply **add** **your own logic before the `next()` statement:**
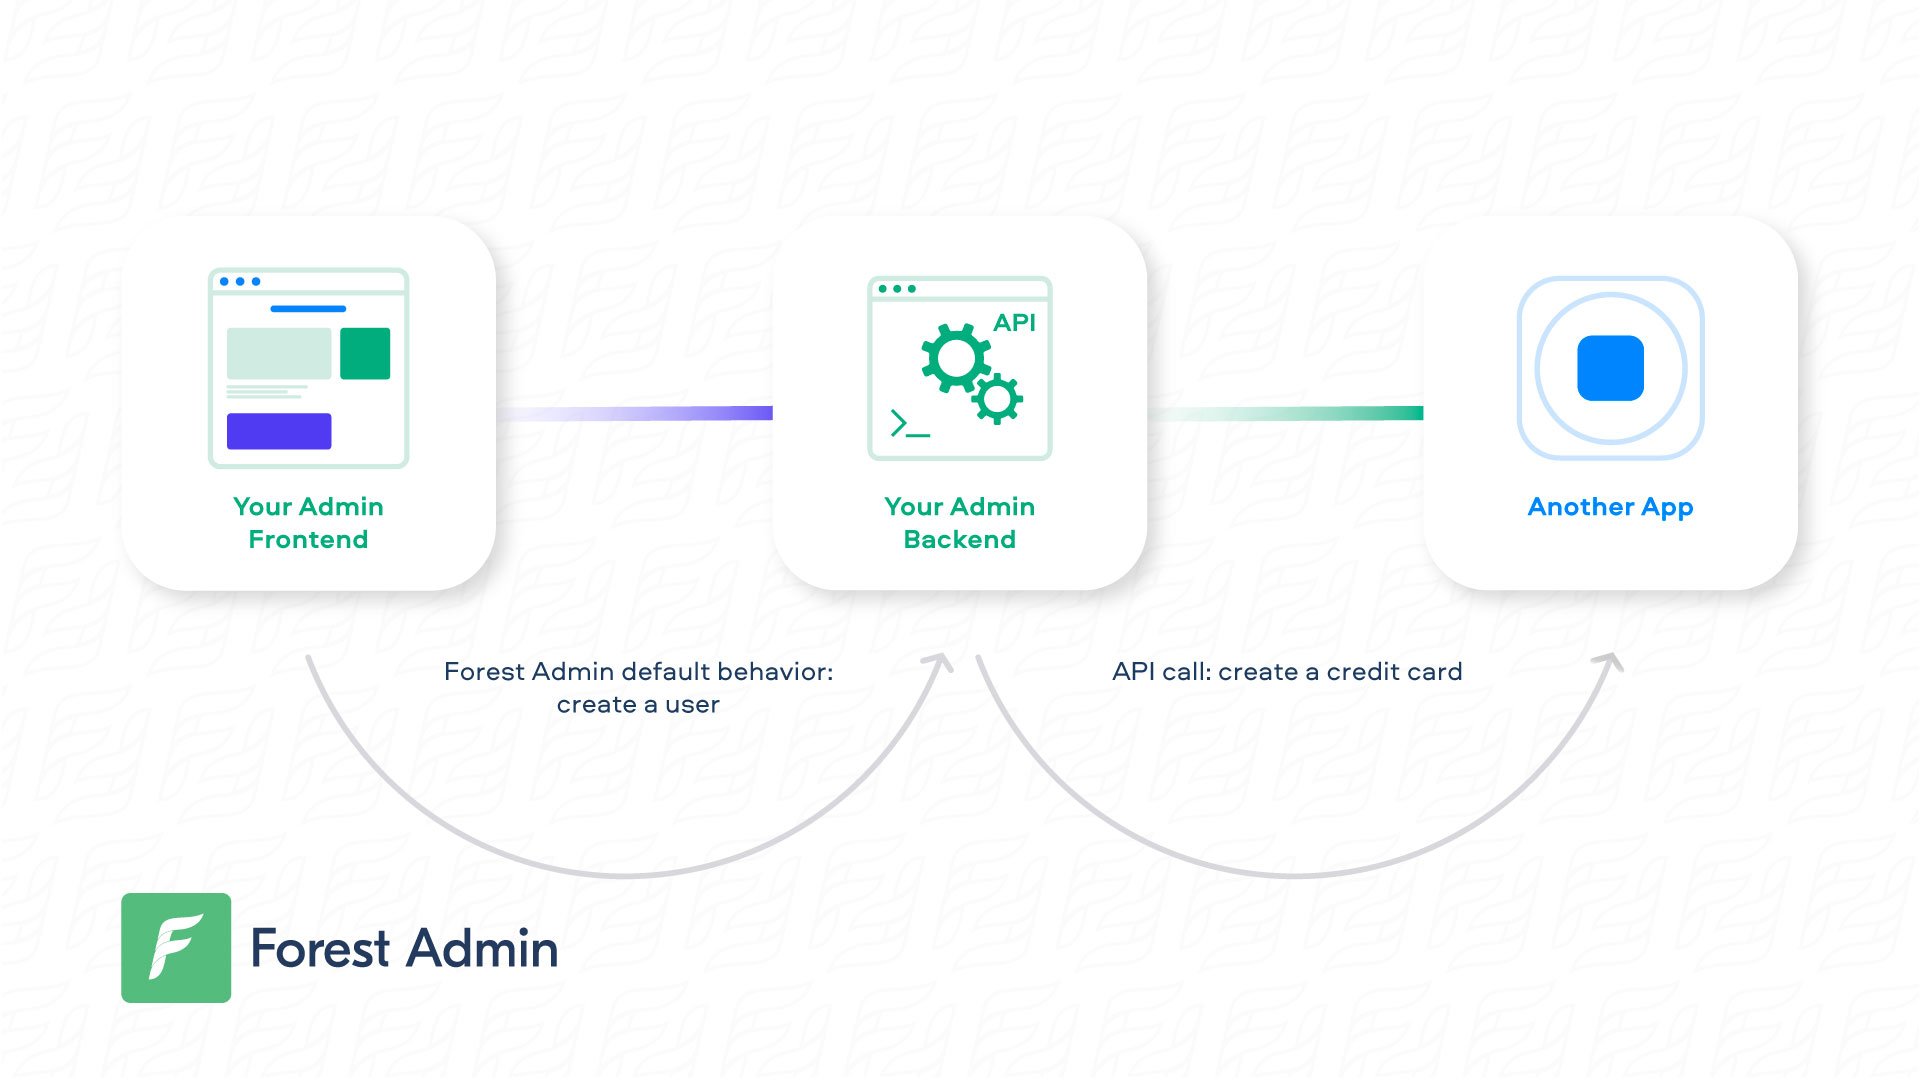
### Adding logic with an API call
The most simple way to trigger your business app's (or any external app's) logic is with an API call!
In the following example, we override the `CREATE` route so that a credit card is created whenever a new customer is created in Forest:
 ```javascript theme={null}
...
// Require superagent once you've installed it (npm install superagent)
const superagent = require('superagent');
...
router.post('/customers', permissionMiddlewareCreator.create(), (req, res, next) => {
// Prepare the API call using the Forest's posted data
superagent
.post('https://my-company/create-card')
// Don't forget to authenticate your request using the relevant authentication method
.set('X-API-Key', '**********')
.end((err, res) => {
// Call next() to execute Forest's default behavior
next();
});
});
...
module.exports = router;
```
### Adding logic with a message broker
Using a message broker - such as RabbitMQ or Kafka - to broadcast events is current practice.
Here is how you could be using [RabbitMQ](https://www.rabbitmq.com/tutorials/tutorial-one-javascript.html) to handle `orders` synchronization across multiple channels:
```javascript theme={null}
...
// Require superagent once you've installed it (npm install superagent)
const superagent = require('superagent');
...
router.post('/customers', permissionMiddlewareCreator.create(), (req, res, next) => {
// Prepare the API call using the Forest's posted data
superagent
.post('https://my-company/create-card')
// Don't forget to authenticate your request using the relevant authentication method
.set('X-API-Key', '**********')
.end((err, res) => {
// Call next() to execute Forest's default behavior
next();
});
});
...
module.exports = router;
```
### Adding logic with a message broker
Using a message broker - such as RabbitMQ or Kafka - to broadcast events is current practice.
Here is how you could be using [RabbitMQ](https://www.rabbitmq.com/tutorials/tutorial-one-javascript.html) to handle `orders` synchronization across multiple channels:
 ```javascript theme={null}
...
const amqp = require('amqplib/callback_api');
...
router.put('/orders/:orderId', permissionMiddlewareCreator.update(), (req, res, next) => {
// Prepare your message from Forest's updated data
var orderId = req.body.data.id;
var orderStatus = req.body.data.attributes.shipping_status;
var message = 'Order ' + orderId + ' shipping status is now: ' + orderStatus;
var queue = 'orders_sync_queue';
// Connect to your Rabbitmq remote instance and publish your message
amqp.connect('amqp://{your_rabbitmq_host}', function(error0, connection) {
if (error0) {
throw error0;
}
connection.createChannel(function(error1, channel) {
if (error1) {
throw error1;
}
channel.assertQueue(queue, {
durable: false
});
channel.sendToQueue(queue, Buffer.from(message));
});
setTimeout(function() {
connection.close();
}, 500);
});
// Call next() to execute Forest's default behavior
next();
});
...
module.exports = router;
```
### Adding logic after Forest's default behavior
At some point, you may want to trigger your remote logic **after** Forest's logic.
To achieve this, you can manually recreate `next()`'s behavior by using the snippets of [default routes](/legacy/ruby-agent/reference-guide/routes/default-routes), then append your own logic.
```javascript theme={null}
...
const amqp = require('amqplib/callback_api');
...
router.put('/orders/:orderId', permissionMiddlewareCreator.update(), (req, res, next) => {
// Prepare your message from Forest's updated data
var orderId = req.body.data.id;
var orderStatus = req.body.data.attributes.shipping_status;
var message = 'Order ' + orderId + ' shipping status is now: ' + orderStatus;
var queue = 'orders_sync_queue';
// Connect to your Rabbitmq remote instance and publish your message
amqp.connect('amqp://{your_rabbitmq_host}', function(error0, connection) {
if (error0) {
throw error0;
}
connection.createChannel(function(error1, channel) {
if (error1) {
throw error1;
}
channel.assertQueue(queue, {
durable: false
});
channel.sendToQueue(queue, Buffer.from(message));
});
setTimeout(function() {
connection.close();
}, 500);
});
// Call next() to execute Forest's default behavior
next();
});
...
module.exports = router;
```
### Adding logic after Forest's default behavior
At some point, you may want to trigger your remote logic **after** Forest's logic.
To achieve this, you can manually recreate `next()`'s behavior by using the snippets of [default routes](/legacy/ruby-agent/reference-guide/routes/default-routes), then append your own logic.